What we English-speakers call raisins, the French-speaking world knows as raisins sec (literally “dry grapes”); in French, raisin by itself means grape. If that’s confusing, don’t worry — both raisins and raisins are featured in today’s post.
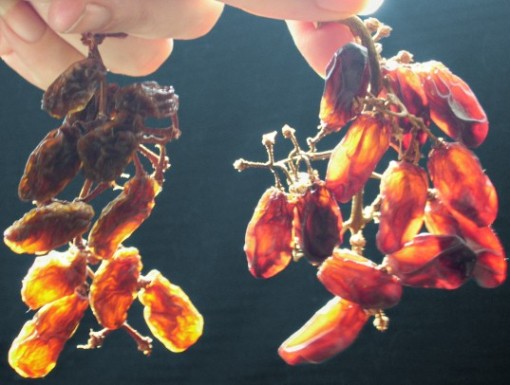
On the left, “golden” raisins; made from green-skinned grapes, they’re more brown than yellow due to being unsulphured1, but not as dark as raisins dried from red or black grapes. The raisins in the larger bunchlet at right were dried from red grapes, giving them a deeper colour.

two bunches of home-dried raisins, sunlight glowing through them like stained glass
Red-grape raisins are finally starting to be available commercially, often sold under the name “flame” grapes, after the most common variety of red seedless grapes. Drying your own may be easier than finding some sold in your local area, and it may be cheaper, too, especially if you wait for the grapes to go on sale. (For some reason, raisins rarely go on sale, whereas fresh grapes are often on sale for $1/lb or less, and even organic grapes can be had for under $2/lb, at least here in Connecticut.)
But is drying your own raisins complicated? Do you need special equipment? Not at all! It’s so easy, the first time we did it was by accident…
It’s a regular occurence with a bag of fresh grapes: you get to the end of the bunch and have just a few grapes left, all of them suspiciously small, or maybe with a crack or other blemish, or they’ve come loose from the bunch and you’re just not sure they’ll still have that fresh-grape pop! when you bite into them. We used to simply throw those grapes away. But one day the bag with the few questionable grapes left in it got moved onto the bedroom windowsill — we have nice, deep cat-width windowsills which often get used as handy shelving for piling things on — instead of being thrown away. We forgot about them entirely, for long enough that by the time we noticed they were there, they’d shrivelled to the point where they’d started to look raisinish. So, always game for an experiment, we left them on the sunny windowsill for another few weeks, until they really looked like raisins. Larger and plumper, and slightly redder, than raisins from the store, but definitely fully raisin-like in appearance and texture.
Carefully, I bit into one. Not only was it definitely a raisin, it was the best raisin I’d ever tasted! We quickly devoured the rest of the handful of raisins we’d inadvertently made, some out of hand but mostly in breakfast cereal (and the last of them in a fantastic raisin and grape-infused-pecan trifle dessert) and deliberately left the less-pretty grapes at the end of our next few bags of grapes on the windowsill. Now, when there’s a really good sale on grapes, we buy more than we’ll be able to eat fresh on purpose, so we can make raisins from the rest.
The technique: Rinse the grapes you want to use, then wipe all the water off, or let them drain a couple of hours to evaporate the rinse-water. You can leave them on the bunch, or take some or all of them off, and each batch will dry more evenly if you at least separate bunchlets from the main stem until you can lay the grapes out no more than two grapes deep. You’ll want to have kept the bag the raisins came in, if it has ventilation holes in it — this page at the manufacturer’s website2 shows one of the most common designs for bags fresh grapes are sold in — or you can add some holes to another bag. Air needs to be able to flow around the grapes, but you want them to be loosely covered to keep dust off, because air-drying does take a few weeks, even in a sunny, south-facing window. We have successfully dried grapes this way even when the weather was almost constantly overcast and/or raining for weeks at a time, but of course the light and heat of the sun helps. We’ve gotten good results in spring, summer and fall weather alike (We’ll update this post once we try raisining over the winter) but the exact length of time it will take for your grapes to dry fully into raisins will depend on how much sun they receive, the ambient temperature, the humidity level, and other local conditions.
Alternate technique: If sun-drying takes too long for your taste, or you’re not comfortable with the air-drying method, there’s a quicker method, too, although we find the resulting raisins not quite as good as the ones dried on a sunny windowsill. Start by rinsing and thoroughly blotting dry the fresh grapes (or letting them dry at room temperature, as above). Lay the grapes out on cookie sheets or in disposable-aluminum3 trays — since the grapes will be going into the oven, it’s best to leave them on the stem as much as possible so that they can’t roll or bounce out into the bottom of your oven — and arrange them in the oven. You can fill each rack in your oven, or dry just one pan-full, just make sure there’s enough room between each rack, and between the racks and the top and bottom of the oven, to allow air to flow between levels. Turn your oven on at its lowest setting; it only needs to be about 180F (82C), but it’s okay if yours doesn’t go lower than 200F (93C). This is important: Once the oven has heated to 180F, open the oven door and leave it open. This increases air circulation and helps keep evaporated moisture moving out of the oven. If your oven door won’t stay open a few inches on its own, you can use an oven-safe utensil to prop it open, but obviously be careful doing this, especially if the utensil you use is metal rather than silicone or another less heat-conductive material. Since it can take two days or longer to dehydrate grapes into raisins using this method, it’s best to do it in colder weather.
Of course, if you own a food dehydrator, you can just use that to raisinify your grapes. But we’re willing to bet windowsill-dried raisins will beat them in a taste test.
One of the subjects of this post is DIY ingredients — DIY standing for do-it-yourself. There are many foods we make that aren’t necessarily meant to be eaten by themselves, as opposed to being added to a variety of other recipes. Typically (though not always) these DIY ingredients could be bought ready-made from the store, but we’ve found that they often taste better and are usually less expensive when we make them ourselves. Home-dried raisins are an example of what we call a DIY ingredient; others which will feature in future posts include garlic oil, simple syrup, and a surprising substitute for parsley.
And now, for something that’s completely different while still being grapes:

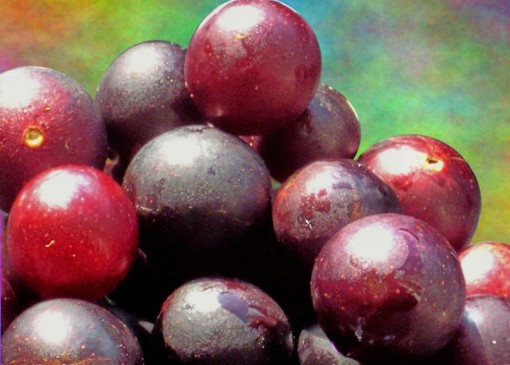
vibrant, gold-spangled muscadine grapes by nature; funky background by Photoshop*
